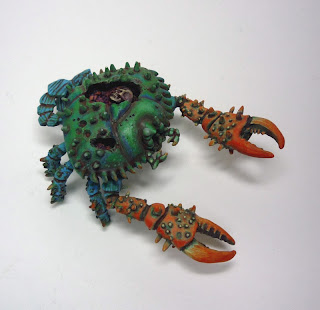
Ok, here is another WIP I did last June, Scuttlebones the Undead Crad.
This mini was sculpted by Jason Wiebe. It's amazing but needed a lot of care before painting.
I had to pin the front legs as the glue was not strong enough to solidly hold them in place.
Then a pale green base coat over a grey primer coat.
Some brown wash.
Some more brown wash.
Then I started some green highlight / blending.
At that point I started working on the base as I needed to mark the
location of the legs on the putty and I didn't want to ruin the paint. I
used some Milliput to shape a reef on which the crab will be standing.
Then i'll use green stuff to create textures.
I then covered the putty with green stuff and added some textures and carved some waves like the ones I did on the bases of my Water Elemental and Wereshark.
And, I applied the primer. So now the base is ready to be painted.
Ok, here are some step by step pictures from painting the water. I started with a Powderburn Brown wash on the rocks. And, I fully painted the waves using a Dark Prussian Blue.
Then, I applied a lighter Blue blend.
I added a green wash on some areas.
A mix of light Bleu and pale Bleu blending.
Then, a light Blue and green highlight.
And finally, some white and pale green/yellow glazing.
Next step, the rocks. A dark Bleu Grey dry brushing.
Then, a light Grey dry brushing.
Some more light Grey blending.
And a Brown Sand wash.
Then, I was thinking of a Beige dry brush on the top surface to create a sand effect... So, I worked on the Crab. I started with some more green blending some more.
And I started highlighting some areas.
Here are some pictures of what's done for now.
I added some blue on the legs and the shell. And, I painted the interior of the shell.
The yellow base coat is now completed on the claws.
I left some green spots so the colors will blend when I’ll apply the upcoming layers.
Some more pictures... I think orange is really adding life to it.
Then, I worked on the red and basecoated the spikes.
I'm done with the crab now. I just wanted to show some more pictures before sealing it.
And, here are the final pictures. Thanks for watching.


