
Good day everyone, I've been working on a diorama display for
some time now and I thought some of you may like the see my progress. I
used AutoCad for my sketches and Inventor to build the 3D model. Then I
used Blender to texture the model and Slicer to generate de code for my
Prusa printer. The following pictures are the steps I went through so
far. It’s my first big project. It's taking long but it's a learning
experience. Let me know what you think about it so far.
The first image is a screenshot of the final model in Inventor software.

Some sketches in AutoCad software.

Floor part in Invetor software.


I got a printing error while printing the floor. The plastic filament and I had to stop the print.


which is at a 0.05mm of precision.


The level of detail is amazing. Even the ring was printed flawlessly without support.

Here’s a screenshot of the wall assembly after I completed texturing it in Blender.

Here’s a screenshot of the wall assembly in Slicer. I
generated the code with supports to make sure the door arch would be
print perfectly.


After, when I generated the code without support, I could clearly see the gaps. I think this happened because there were errors, holes I didn’t correct or masking I didn’t remove, on the model I imported from Blender. I will need to investigate farther.


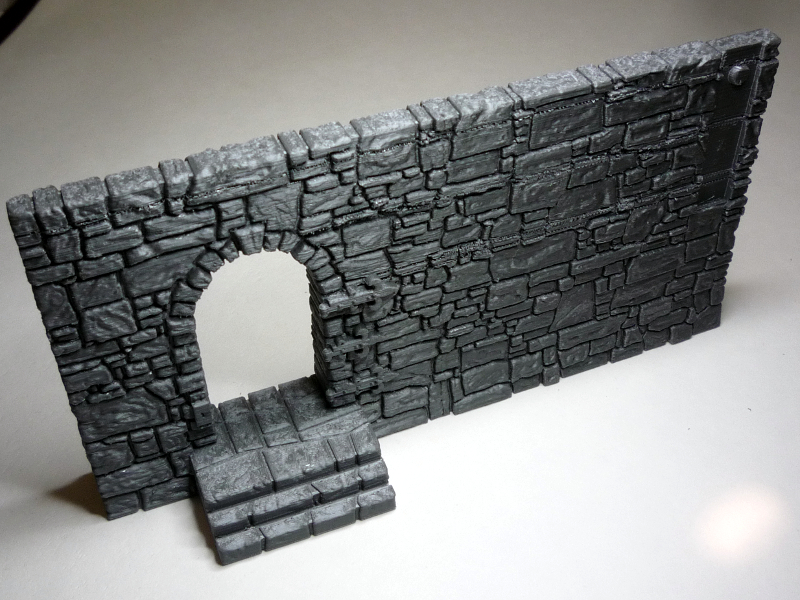
Here’s a picture of the wall. It took 40 hours to print only and probably another 40 hours to build, texture and clean the model. I still need to fill the gaps the Greenstuff.
Here are all the parts I printed for this project.

And, all the parts together. I haven’t glue anything yet. There is still some sanding and cleaning to do. I will paint each part separately.

I patched the gaps with liquid Green Stuff.

Closeup of the first layer of liquid Green Stuff.

I converted a 02712 Eye Best from Reaper Miniatures.
This is the pewter version of model that was sculpted by Julie Guthrie.
I added eye stalks from the 03440 Creature Components II, also from Reaper.


The Eye Best will be pinned on the wall and the door. All the adventurers I'll be displaying on the diorama are from Reaper Miniatures Dungeon Dwellers brand. From left to right; 07012 Caerindra Thistlemoor, 07004 Stitch Thimbletoe, 07002 Baran Blacktree and 07008 Luwin Phost.


The models can be moved from a recess to another to allow different layouts.


No comments:
Post a Comment